
Important notes | Ingredients | Prepare your sourdough starter
Dough | Shape | Bake
Adding activated charcoal* to Sourdough bread is as simple as following your favourite sourdough bread recipe. Well… almost!
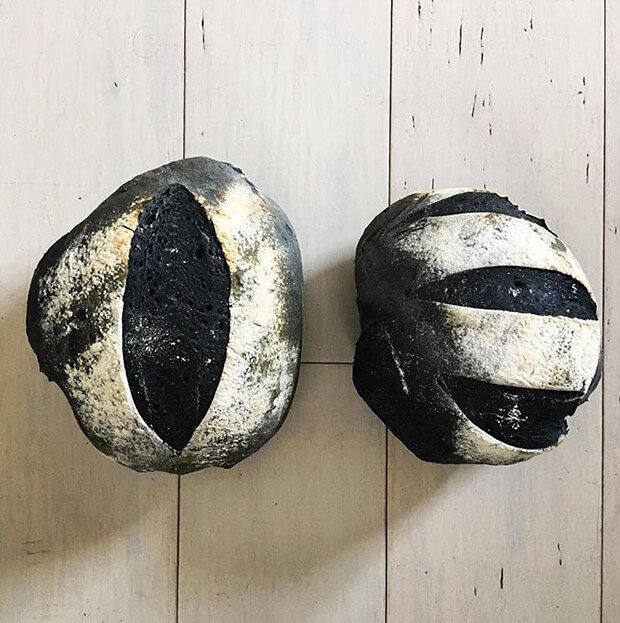
Activated charcoal doesn’t change the flavour of your loaf of sourdough but it will change the colour, producing a dramatic, jaw-dropping loaf!
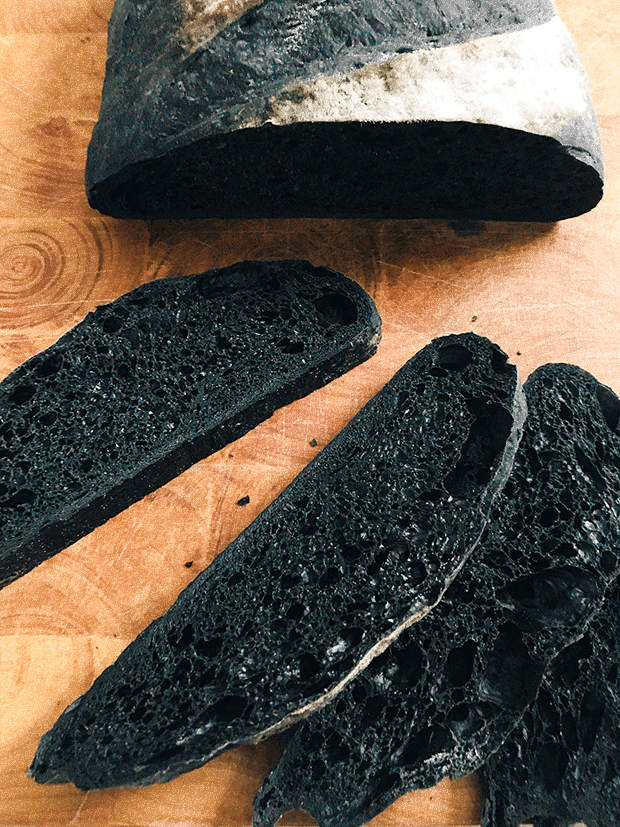
This sourdough bread looks like it has been baked in a fire and is as hard and dry as charcoal itself. It is, however, as soft and tasty as any loaf of sourdough bread with a colour that inspires a sense of adventure and awe.
What makes this sourdough bread almost as simple as your usual loaf?
Activated charcoal is like a dye and you’re using is as one to colour your dough. So treat it as one too. Wear disposable gloves, don’t get it on your clothes and use a bowl you’re not precious about. The charcoal shouldn’t stain any of the above. BUT.
Just.
In.
Case.
Activated charcoal also comes with a medical warning for its chemical (and medicinal) absorption qualities. So please read the Important Notes 👇
IMPORTANT NOTES
If you rely on medication for good health or are pregnant, please consult your healthcare professional to make sure this is suitable for you as the high absorption properties may affect medication intake or existing nutrients in your system.
Wear disposable gloves
Make sure you protect your hands from the raw, dramatic colour of the activated charcoal and make sure the activated charcoal doesn’t come into contact with any open wounds as it can tattoo open skin.
Wear an apron if you are worried about your clothing getting stained and when shaping your loaf use an oiled baking tray instead of working directly on your kitchen bench if you are at all concerned about discolouring your bench-top.
Activated charcoal is easy to use and stay clean, just be mindful.
INGREDIENTS
180g Active sourdough starter (6.3 oz) SEE NOTE
270g Water* (9.5 oz)
9g Salt (0.3 oz)
1/3 Cup of activated charcoal powder**
2 1/2 Tablespoons of extra water
NOTE
180g sourdough starter (6.3 oz) is equivalent to:
1. Low-maintenance sourdough starter Your jar from the fridge + 2 feeds (Steps 1-2)
2. 1 Batch of Pantry Sourdough Starter 3 Feeds (Steps 1-3)
3. Traditional sourdough starter fed to more than 180g (6.3 oz) so that you have some leftover to continue feeding
*Use warm for a faster rise, use room temperature water for a slower rise such as during a workday or overnight.
**To purchase activated charcoal powder try your local health food store or to get it delivered try this one from Amazon AU, this one from Honest to Goodness (also AU) or Amazon worldwide.
PREPARE YOUR SOURDOUGH STARTER AHEAD
Low-maintenance: 2 Feeds. Steps 1-2 in the recipe card with your kit
Pantry Sourdough Starter: 3 Feeds. Steps 1-3 in the recipe card with your kit
Traditional sourdough starter OR your own: You need 180g of sourdough starter (6.3 oz) for this recipe. It needs to be fed and doubled by the time you make the dough.
DOUGH
1. Scoop 180g of sourdough starter (6.35 oz) sourdough starter into a large mixing bowl.
Following the Low-maintenance process? You will have 5g of sourdough starter left in your jar (0.2 oz). Now is the time to do FEED 1: Add 10g warm water & 10g bread flour to the small amount of starter in your jar. Stir & place in the fridge until next bake or once a month, whichever comes first.
Pantry Sourdough Starter and Traditional sourdough processes don’t require any specific action. However, a traditional starter may need feeding.
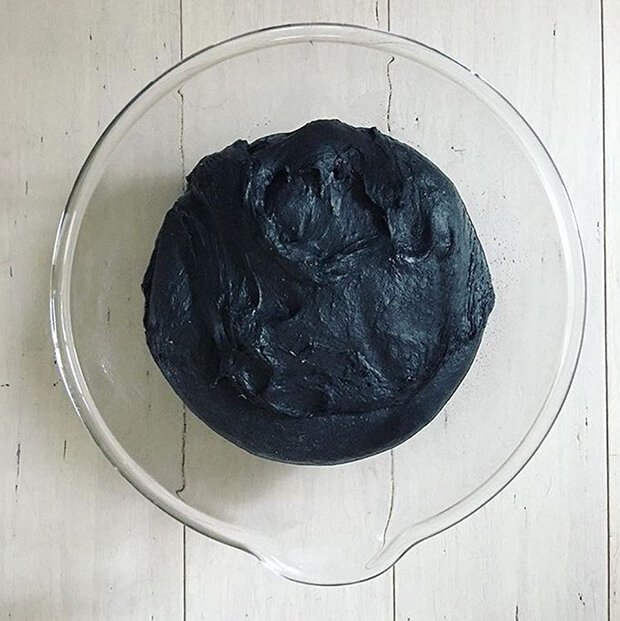
2. Add 9g of salt (0.3 oz), 270g of water* (9.5 oz), 1/3 cup activated charcoal powder and 2 1/2 Tablespoons of extra water directly to your bowl with the sourdough starter and stir vigorously to dissolve all solids.
2. Add 415g of bread flour (14.6 oz). Mix well to combine.
3. Wearing disposable gloves, squeeze the mix (like a sponge) for 1-2 minutes using your hands. This will help ‘push’ water into the flour and hydrate it. Clump the dough into a ball shape and wash your hands.
4. Cover the bowl* with cling wrap^ and leave to double somewhere where the temperature will be fairly stable.
Doubling guide time for your kitchen temperature at the moment:
– 18°C or below (64°F): 12+ hours
– 19-23°C or below (65-74°F): 8-10 hours
– 24°C or above (75°F): 4-5 hours
If you are around while your sourdough is rising, as you approach the end of the rise time check every now and then to see if the dough has doubled in size. Especially if you just guessed the temperature.
Your dough will be ready to shape when it’s twice its original size, puffy and a number of bubbles may be poking through the surface or seen on the side. (Using a glass bowl makes it easy to see but not essential!)
*If you don’t mind doing an extra step, using a clean, lightly oiled bowl stops the dough from sticking to the bowl during the rise. When you tip the dough out later, you will keep all the lovely air pockets that form. When dough sticks to the bowl, it stretches as it releases and tears the air pockets that help it rise.
^Using a clear reusable shower cap over your bowl, instead of cling wrap, helps put less plastic in landfill.
SHAPE
1. Lightly oil your bench-top and gently tip out your dough. If you made enough for two loaves and made it as one dough, use a dough scraper or firm plastic spatula, cut the dough into two equal halves.
Work gently from here. You want to keep as many air bubbles in your dough as possible.
2. Using wet hands, pinch one side of the dough and stretch it up towards the ceiling, then fold across the dough to the other side. Pinch next to where you pinched last time and repeat. Work your way around the dough, overlapping the previous fold through the centre each time. This process is like wrapping a present tightly. Pull and stretch 12-14 times until your dough becomes tight. It will start to resist as you work until it becomes too difficult. Then you know you’re done!
3. Grab a piece of baking paper and gently place your loaf onto the sheet seam side underneath.
If you don’t mind another step for optimal oven spring, read this post about placing your loaf with the seam side up instead of underneath.
4. Use the baking paper to lower the loaf into a large Tupperware container or oversized bowl.
5. Seal with the Tupperware lid or cling wrap and place into your refrigerator for a minimum of 10 hours, and up to 24 hours.
That’s it until you bake!
BAKE
Before following the next step, you need to choose your baking method:
Dutch oven or casserole dish
Pizza stone
Faking it – Baking without a Dutch oven or pizza stone
1. Preheat your oven for 45 minutes to 1 hour at 250°C (482°F). Remember to add your Dutch Oven, Pizza Stone or chosen bakeware. The heat absorbed during this time is super important in helping the loaf rise.
2. After the oven has been on for an hour, take your loaf out of the fridge. Lift it from the container using the baking paper and place it on the bench.
3. Brush your sourdough loaf generously with water* and lightly dust with flour.
4. Using the sharpest knife you have or a razor blade move deeply, quickly and confidently on an angle through the loaf. If you go slow, the knife will drag the dough. This helps control the oven spring and make your loaf look professional.
5. To bake your sourdough bread follow the method chose:
Dutch oven or casserole dish
Pizza stone
Faking it – Baking without a Dutch oven, casserole dish or pizza stone
6. Your loaf is cooked when it sounds hollow as you knock it on the bottom with your knuckles. (Like knocking on a door.)
Serve toasted with lashings of butter or ricotta cheese and honey.
*Wetting your sourdough loaf stops the crust from forming early and restricting the size of the loaf. It also helps to add gloss to the crust and make it crunchy.
CELEBRATE!
Tag us so we can celebrate with you!
#mysourdoughlovestory #beautifullivingmadeeasy
@beautifullivingmadeeasy

Valerie Marinko
December 31, 2020OMG Love this how cool. Bought your flakes very impressed with your follow up email very professional and great to get the recipes I’m not new to making bread but new to making sourdough very excited.
Mary-Jane
January 1, 2021Oh, you’re a bread maker!!! ❤️ You’ll find there are some similarities between working with yeast and sourdough but there are quite a few differences too. Timing will be very different! And sensitivity to flour. The sourdough process is not as fast nor forgiving. But the process can be more flexible and produces a more sophisticated flavour. Not sure if you have a bread machine, I assume you may with your experience:) You can use it to knead the dough for sourdough and do the rest by hand. Just swap out the Dough & Rise section of all the recipes for this process and follow everything else.