
After more than a decade of baking sourdough bread on a pizza stone, I was loathed to try any other baking method. Even for just one bake! After so much failure, when I first started began the sourdough journey, I didn’t want one loaf to fail even slightly!!
However…
I was BRAVE.
And in one experimental moment, confidence gained by so many others how had gone before me, a revelation took place in the way I bake sourdough.
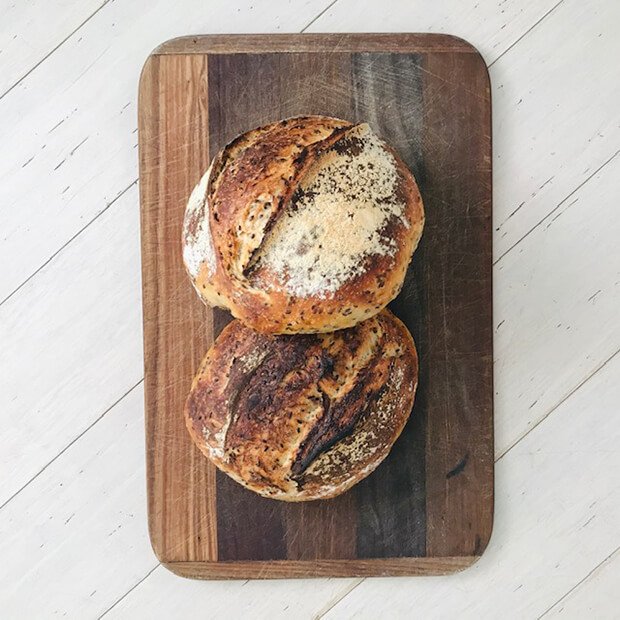
My loaves had always been tasty. Rustic. Raved about. Requested. Enjoyed. But the crust had never been glossy. It had never darkened to the sands of central Australia on a sunburnt day. No. It had always been light, like the beach, and as matte as a sunny day.

Baking sourdough bread in a Dutch oven improved the look of the bread. It increased the size of the loaf slightly and meant that I didn’t have to turn the oven down after 10 minutes. I didn’t have to add steam and it was just easy. But I did need the best oven gloves money can buy.
So… baking sourdough in a Dutch oven has become my new go-to for making sourdough bread.
The following method for using a Dutch oven to bake sourdough is designed to work with our no-knead sourdough, easy-proof process for making sourdough. Hence, the instructions below mention removing the dough from the fridge.
Discover Why I use the refrigerator method for proofing sourdough – The easy way to PRO proofing
You can still use the method below for baking sourdough bread when proofing your sourdough loaf at room temperature. The process will be entirely the same, except that you’ll be working with a room-temperature dough:
- You will need to know when your dough is ready to bake.
- Do NOT flip your loaf over before baking, as mentioned below, unless you have proofed it upside down in a banneton. Your dough will be warm and if you flip the dough using your hand, as I do, the pressure from your hand will cause it to collapse. My dough is cold from the fridge and can withstand the brief handling. Where it says ‘take your loaf out of the fridge during Step 3, take your dough from your benchtop and jump to Step 4.
- If you are baking more than one loaf and are only able to bake one at a time, it will be difficult to not over-proof the loaf left on your bench waiting for its turn, especially as the oven heats up the kitchen.
See: Tips on how to bake more than one loaf at a time
Discover How to know when your sourdough is ready for baking – The Poke Test
BENEFITS OF BAKING SOURDOUGH BREAD IN DUTCH OVENS
- You don’t need a pizza stone
- You probably already own one
- The dough is sealed from fan-forced air that wants to create an early crust
- Multi-purpose. Make beautiful casseroles & slow-cooked meals
Drawbacks
- You’ll need to tag-team the baking process if you’re making more than one loaf at a time and only have one dutch oven/ or space for one Dutch oven in your oven

MY DUTCH OVENS
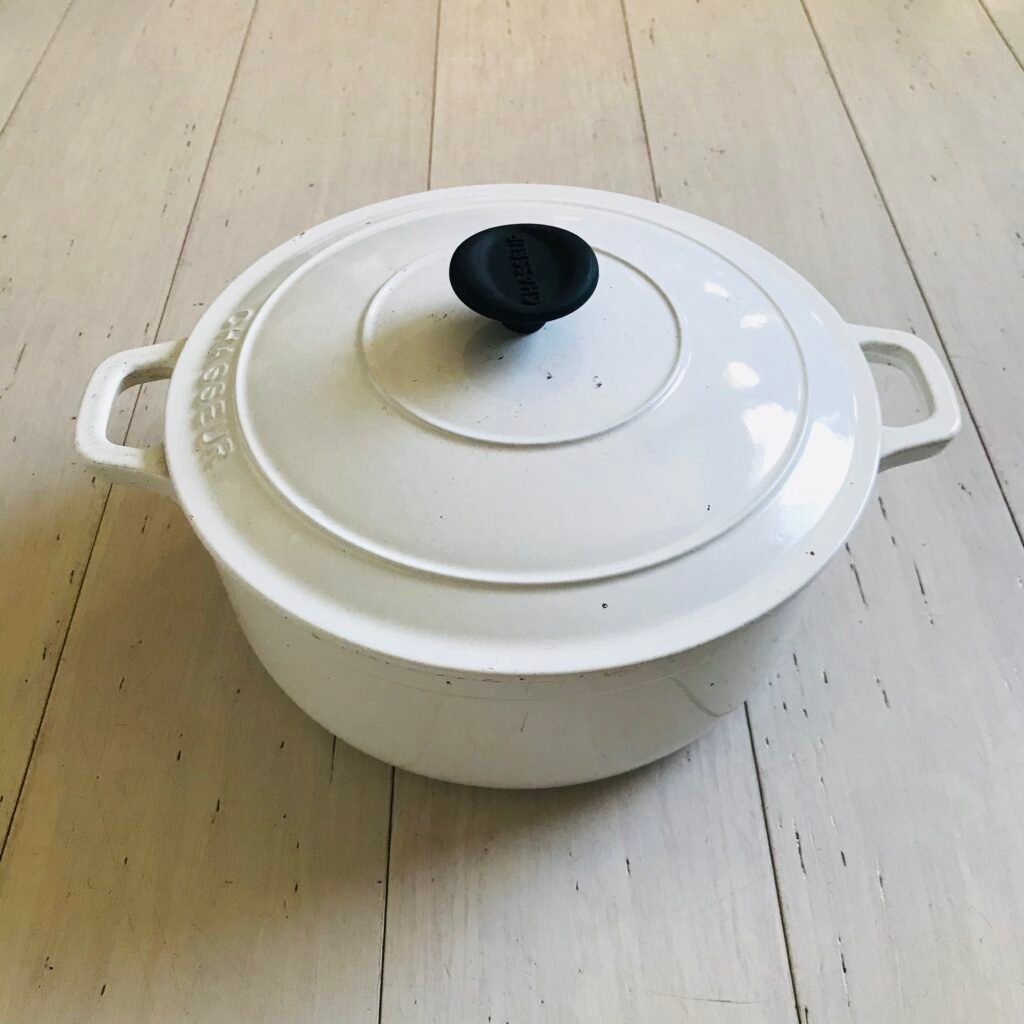
I have two Dutch ovens that I use for sourdough bread. The oldest and longest-serving is my 24cm Chasseur French Oven in Brilliant White (pictured below left) which I’ve had for about 10 years. You can get online from Amazon AU. They also come in a range of other colours. This is a coated Dutch oven which means it doesn’t need seasoning and cleans well. Even with using mild oven cleaner for stubborn stains, and washing in the dishwasher, the surface has never peeled. I have had other cheaper cast-iron casserole dishes and they lasted only 12 months before the surface started flaking into our food. That was under regular use, before bread baking, which puts Dutch ovens under pressure at high temps. I trust Chasseur at these hot temperatures. Made from cast iron, it holds heat brilliantly well and is used for far more than bread baking.
My other Dutch oven is raw cast iron so need seasoning. For this reason, I have made it bread dedicated. That way it doesn’t need washing regularly and water stays far from it, keeping it from rusting and me from regular seasonsing. It’s from Ikea. I bought this one because of its length so that I could make semi-baguettes and other longer styles of bread. I’m just a bit obsessed. The Chasseur was enough!
For international readers (non-Aussie), this Lodge pre-seasoned raw dutch oven from Amazon looks like amazing value and is multi-purpose. I haven’t used it, since I am in Australia but it seems similar to my ikea one. Here are some other Dutch ovens, including coated, that are a good size for bread (min 4qt). Again, I have only used the two above but there are many you can choose from.
Dutch ovens are an investment and should only have to be purchased once. Read reviews, look at star ratings. Customers rarely lie!
Other things to consider when looking for a Dutch oven, along with the surface type (coated or uncoated) you need to look at the volume and height, even more than the shape. You can always shape sourdough loaves to suit round, square or oval Dutch ovens/casserole dishes but you can’t work around height issues.
Your loaf needs at least 10cm of height to spring upwards, including the lid.
Volume-wise, you will need something at least 3.8L (4qt) to fit the loaf fully baked.
BAKING SOURDOUGH BREAD WITH A DUTCH OVEN OR CASSEROLE DISH
Equipment
Dutch oven or large casserole dish with lid
Oven gloves – good quality
Wooden chopping board
Knife (sharpest you have)
Spray oil
Water
Flour for dusting
Method
WATCH THIS PROCESS
OVEN PREHEAT
1. Place your dutch oven with lid or large casserole dish with lid, into your oven on the middle, or lower shelf.
2. Preheat your oven and baking vessel for 45 minutes to 1 hour at 250°C (482°F). The heat absorbed during this time is super important in helping the loaf rise.
If you have the option to heat the bottom plates inside your oven, as well as use the fan-forced function, this is ideal. Turn it all on!
LOAF PREPARATION
3. After the oven has been on for 45 minutes to 1 hour, take your loaf out of the fridge. (If working with room temperature dough jump to Step 4)
Lift your sourdough, well chilled, from the container using the baking paper and place it on the bench.
Your loaf will likely look flat, with a large top and small bottom. Don’t worry! It will magically transform in the oven.
Optional step: If you placed your loaf seam side up in the previous step, pick up the dough and gently turn it upside down*. The dough will be firm enough to handle since it is cold. Don’t do this if you skip the refrigerator method – either don’t flip it or use a banneton and baking paper to aid flipping it. Once flipped, place it back onto your baking paper. What was the bottom of the loaf should now the top. If the loaf feels very soft and your hand is starting to sink into it, DO NOT FLIP. The dough is overripe and your hand will degas it. Leave it and consider not slashing it. Bake otherwise as usual. If your loaf sticks to the baking paper when you try to flip it, your flour may have a low hydration threshold, meaning it takes on water easily. Spelt is a good example. Pre-oiling the paper helps with this. Don’t flip it this time, you risk deflating your loaf trying to remove it from the paper. Bake as normal (including slashing). If you want to try this step, add 40g less water next time to make the dough less sticky.
4. Brush your sourdough loaf generously with water*, about 1-2 Tablespoons, and lightly dust with flour.
If using a casserole dish please do not let water from the wet loaf make direct contact with the hot dish, as it may crack. You may need to wipe excess water off your baking paper.
*Wetting your sourdough loaf stops the crust forming early, restricting the size of the loaf. It also helps to add gloss to the crust and make it crunchy.
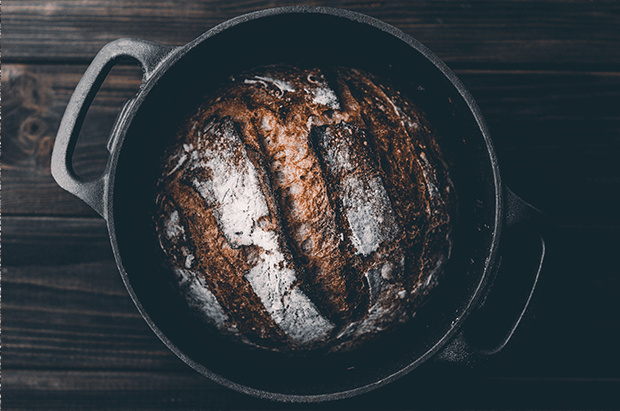
5. Using the sharpest knife you have or a razor blade move deeply, quickly and confidently on an angle through the loaf. If you go slow, the knife will drag the dough. This helps control the oven spring and make your loaf look professional.
BAKING YOUR SOURDOUGH
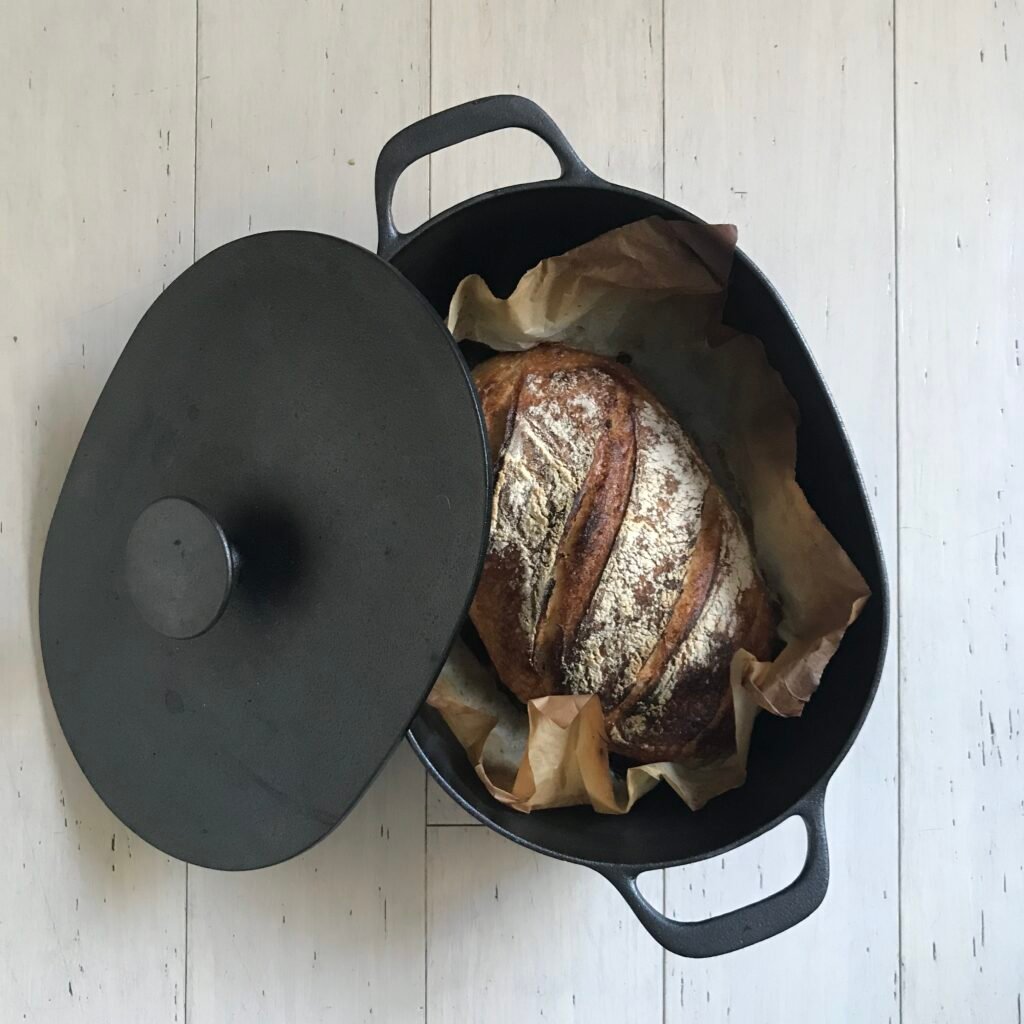
6. Carefully take the Dutch oven or casserole dish out of the oven. Remove the lid.
7. Using the baking or parchment paper, carefully lower the dough into the Dutch oven or casserole dish. Replace the lid and bake for 30 mins.
8. After 30 minutes, open the oven and carefully remove the lid from the baking vessel and continue baking for 15 mins or until dark brown.
9. Place the loaf upside down and knock on it like a door. Your loaf is cooked when it sounds hollow.
10. Celebrate and tag us!
#mysourdoughlovestory
#beautifullivingmadeeasy
@beautifullivingmadeeasy
BAKING 2 LOAVES OF SOURDOUGH WITH ONE DUTCH OVEN
Both your loaves will be ready to bake at the same time, but in most cases, using the Dutch oven method, won’t allow them both to bake at the same time. The exception would be having two Dutch ovens and/or casserole dishes and also having an oven that fits both of them.
To get around this, place (or leave) the second loaf in the refrigerator while you bake the first one. This will stop the second loaf from over proofing (and losing all that fabulous energy that causes it to spring in the oven).
When the first loaf is baked, remove the second loaf from the fridge.
Reheat the Dutch oven and lid again for 5 minutes and cook the second loaf of sourdough, the same as the first.
Tip: If you used the Refrigerator method to delay baking, simply leave the second loaf in the fridge while you bake the first and follow the same process as above.