QUICK LINKS
You can use your pizza stone to bake wonderful sourdough bread. The majority of my sourdough loaves since I started out in 2008, have been baked on a pizza stone. To be honest, I didn’t know or trust any different! With so much failure to begin with, once I cracked this sourdough thing and got decent bread happening, I was loathed to try baking sourdough any other way.
#nomorefailureplease 😜
I did, however, brave up and try baking one loaf of sourdough bread, in a dutch oven, just to see what all the fuss was about.
Hmmm. I did find it gave superior results. The main reason is that it traps steam, allowing the loaf to rise longer and doesn’t form the crust so early because it’s not directly exposed to the hot, circulation air of the oven. After the lid is removed partway through baking, the surface dries, curing a glossy and golden crust.
I live with my oven shelves lined with terracotta tiles (aka pizza stones) 24/7. That’s 6 shelves across two ovens, even to this day. So I wanted to find a way to improve baking sourdough bread with them.
To hack the whole Dutch oven experience there are two common household items that you can use to trap steam and protect the crust from forming while your loaf is still rising.
You can use:
- A Cake tine turned upside down over the dough
- A baking tray with 1cm of boiling water that you place in the bottom of your oven when you slide your dough in to bake

The following instructions are designed to give you the best results possible for baking homemade sourdough bread on a pizza stone. It also completes our no-knead, easy-proof process for making sourdough bread. Hence, the instructions below mention removing the dough from the fridge.
Discover Why I use the refrigerator method for proofing sourdough – The easy way to PRO proofing
You can still use the method below for baking sourdough bread on a pizza stone even when proofing sourdough at room temperature. The process will be entirely the same, except you’ll be working with a room-temperature dough so you need to:
- Know when your dough is ready to bake
- NOT flip your loaf over before baking, as mentioned below, unless you have proofed it upside down in a banneton. Your dough will be warm and if you flip the dough using your hand, as I do, the pressure from your hand will cause it to collapse. My dough is cold from the fridge and can withstand the brief handling. Where it says ‘take your loaf out of the fridge during Step 3, take it from your benchtop and jump to Step 4.
Learn How to know when your sourdough is ready for baking – The Poke Test
Baking sourdough bread using a pizza stone
Equipment
Pizza stone or untreated terracotta tile (washed, heated and cooled prior if it is new)
Wooden chopping board
Extra-large cake tin (optional but will make a big difference) OR Baking tray with 1cm of boiling water
Knife (the sharpest one you have)
Spray oil
Water
Flour for dusting
Clean tea towel
Method
OVEN PREHEAT
1. Place your pizza stone on a shelf in the lower half of your oven.
2. Preheat your oven and pizza stone for 45 minutes to 1 hour at 250°C (482°F). The heat absorbed during this time is super important in helping the loaf rise. If you have the option to heat the bottom plate as well as use the fan-forced function, this is ideal.
LOAF PREPARATION
3. After the oven has been on for 45 minutes to 1 hour, take your loaf out of the fridge. (If working with room temperature dough jump to Step 4)
Lift your dough, well chilled, from the container using the baking paper and place it on the bench.
Your loaf will likely look flat, with a large top and small bottom. Don’t worry! It will magically transform in the oven.
Optional step: If you placed your loaf seam side up in the previous step, pick up the dough and gently turn it upside down*. The dough will be firm enough to handle since it is cold. Don’t do this if you skip the refrigerator method – either don’t flip it or use a banneton and baking paper to aid flipping it. Once flipped, place it back onto your baking paper. What was the bottom of the loaf should now the top. If the loaf feels very soft and your hand is starting to sink into it, DO NOT FLIP. The dough is overripe and your hand will degas it. Leave it and consider not slashing it. Bake otherwise as usual. If your loaf sticks to the baking paper when you try to flip it, your flour may have a low hydration threshold, meaning it takes on water easily. Spelt is a good example. Pre-oiling the paper helps with this. Don’t flip it this time, you risk deflating your loaf trying to remove it from the paper. Bake as normal (including slashing). If you want to try this step, add 40g less water next time to make the dough less sticky.
3. Brush your sourdough loaf generously with water*, about 1-2 Tablespoons, and lightly dust with flour.
*Wetting your sourdough loaf stops the crust forming early, restricting the size of the loaf. It also helps to add gloss to the crust and make it crunchy.
4. Using the sharpest knife you have or a razor blade move deeply, quickly and confidently on an angle through the loaf. If you go slow, the knife will drag the dough. This helps control the oven spring and make your loaf look professional.
BAKING YOUR SOURDOUGH
5. Slide a wooden* chopping board underneath your dough still on the baking paper. Open your oven and promptly slide the loaf, and baking paper, onto the pizza stone with a fast, firm, forward flick of the chopping board.
*WHY USE A WOODEN CHOPPING BOARD?
Wooden chopping boards have no edges, are rigid and won’t crack or melt if they come in contact with the oven shelf or pizza stone.
6. Cover the dough inside the oven with an extra large-cake tin turned upside down. Alternatively, place a baking tray with 1cm of boiling water in the bottom on the lowest shelf or even oven floor for some steam. There is no need to do both.**
**WHY USE A CAKE TIN TO COVER THE DOUGH or ADD STEAM TO THE OVEN?
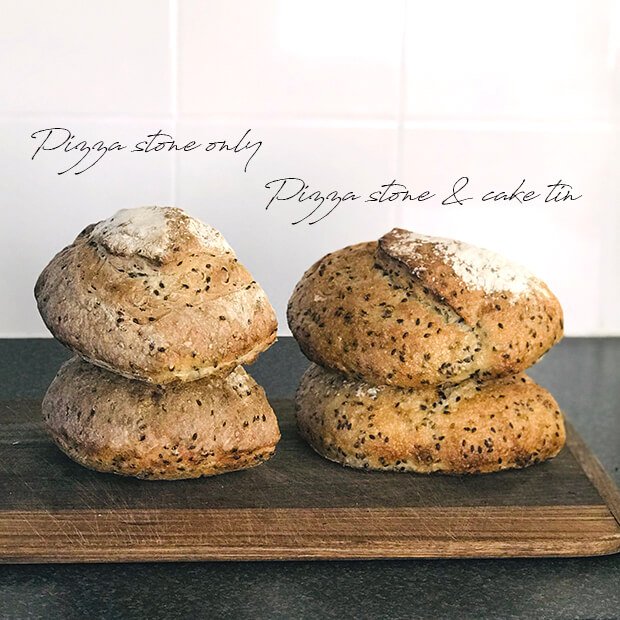
Remember how you had to wet the dough before dusting it with flour and slashing it? Covering the loaf with a cake tin causes the moistened bread to steam. This stops the bread from drying on the surface in the hot oven air, forming a premature crust. So your bread rises more and also gets a great colour, becoming glossy on the surface. The cake tin is removed to allow the crust to form and mature in colour. Adding boiling water to the oven will mimic this same process. You can skip both, however pizza stones without steam will produce a crust with a rustic, matte appearance and your loaves may not grow quite as much.
7. Bake your sourdough on the pizza stone for 10 minutes at 250°C (480°F), remove the cake tin ‘lid’, reduce the heat to 190°C (370°F) and continue baking for 25-35 mins.
8. Place the loaf upside down and knock on it like a door. Your loaf is cooked when it sounds hollow.
To store your sourdough bread, let it cool completely. Then place in a plastic bag that you can seal tightly. It will keep on the kitchen bench for 2-3 days. Alternatively, slice it before placing in the plastic bag and store it in the freezer for sensational toast!
Celebrate and tag us!
#mysourdoughlovestory
#beautifullivingmadeeasy
@beautifullivingmadeeasy

Make sourdough bread without maintaining a sourdough starter
Making sourdough bread is one of my life’s greatest delights! And those who make their own, usually share the same love. It’s a labour of love, or dance, as I like to call it of weaving feeding the sourdough starter, making dough, proofing, baking and all the bits that come with sourdough, into your everyday life.
Maintaining a sourdough starter is easy if you are baking all the time. When you bake bread – you feed your sourdough starter. For someone baking all the time, they will be feeding their sourdough starter regularly enough to keep it alive, as well.
This doesn’t make it easy for someone who doesn’t want to so often. They still need to feed the sourdough starter at least once a day to keep it healthy and alive.
Sourdough can feel time consuming and complicated. So many people in my world have said they could never make sourdough.
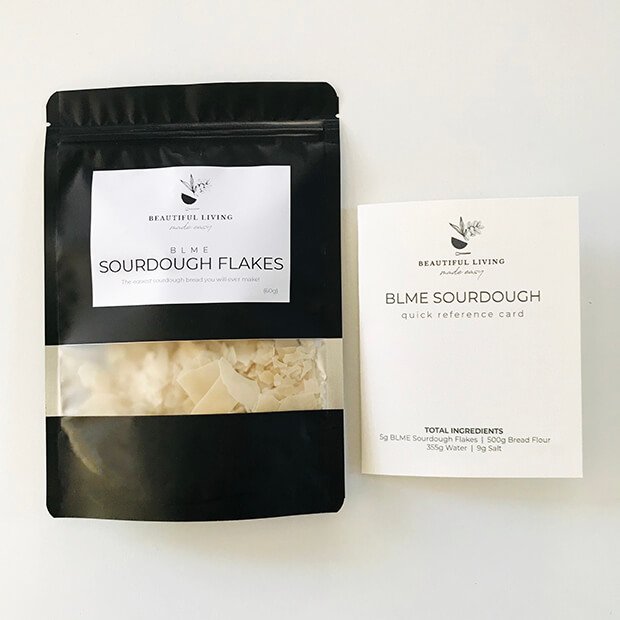
So, I made sourdough flakes.
What are sourdough flakes?
My sourdough starter, that I feed daily, and put to sleep so that you can store it on your shelf without feeding it daily or ever – until you want to bake. You can even take it on holidays!
I’ve made the process no-knead, so that a bread machine or hard labour are not required.
The process takes a little longer than making Traditional Sourdough bread but it’s FAR LESS time consuming and less time-dependant. Each step is set-and-forget, requiring a total of 15 minutes hands-on from start to finish.
Purchase sourdough flakes from our Store.
Each packet makes 6 loaves of authentic sourdough bread, 36 pizza bases or anything else sourdough that you can think of!
Read reviews from those who have tried it!


