

Ingredients | Sourdough starter | Pre-dough Prep | Dough | Shape | Bake
I don’t bake a whole lot with wholemeal bread flour. It’s not on purpose, I have just naturally hung around smooth, silky white doughs. They taste good. Are often organic and wholemeal… well it can be more earthy than I am used to, especially with the addition of sourdough.
I have used a fair bit of spelt, rye and other flours. I love trying any flour at least once. So when I ordered some white heritage flour to try, which still has the bran in it and so behaves like wholemeal flour, I was quite surprised. Wholemeal (flours with bran) don’t just make a honey or maple coloured loaf of sourdough with an earthy flavour, they make quite a different style of dough. My usual, easy no-knead sourdough recipe didn’t hold up so well.
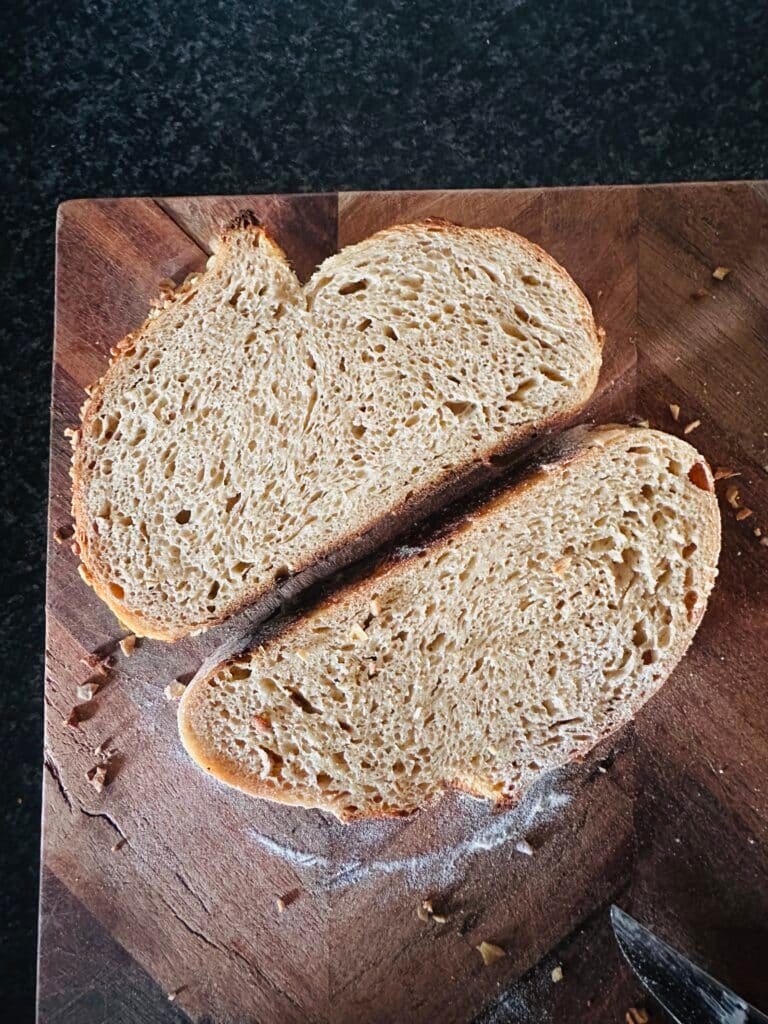
I know this post is about wholegrain and wholemeal flour but it can include white heritage flour. It is a wonderful earthy grain that dates back to prior to 1960 without any changes to turn it into a modern grain. It’s slightly pink in colour and bakes a maple coloured interior (crumb).
THE DIFFERENCE BETWEEN WHOLEMEAL AND WHITE BREAD FLOUR
Wholemeal bread flour and white bread flour are made from the same grain. It’s the same wheat grown in the field. What is different is how it’s processed and what is included inside your packet. The white flour contains only the endosperm of the wheat grain, Everything else about the grain is removed, including the nutrients found in the other parts.
Wholemeal flour is made using the entire grain (to varying degrees) and therefore contains the endosperm, wheat germ and bran. This gives the flour a darker colour and higher nutritional content.
THE DIFFERENCE WHOLEMEAL / WHOLE GRAIN FLOUR MAKES TO SOURDOUGH BREAD
Bread making is a transformational process of activating the gluten bonds within the flour by the addition of water, it gives the flour the ability to stretch.
The retention of the whole grain does several things when it comes to this process of hydration transforming the bread flour into a stretchy, puffy mass.
- Wholemeal and whole grain flour takes longer to hydrate
One of the reasons white flour uses the endosperm only is that it is the soft interior of the wheat grain. The resulting flour is smooth and even throughout. Being soft, it absorbs less water, more readily. Wholemeal and whole grain flours absorb more water less readily. Since hydration is essential in activating the stretchy gluten content, wholemeal doughs need more water to produce the same amount of stretch. Hence, why my normal no-knead sourdough recipe didn’t hold up so well. There wasn’t enough water for the wholemeal flour to respond in the same way as white bread flour.
2. The bran and germ are like tiny, slicing shards when it comes to gluten strands
The retention of the whole grain causes the long elastic bands of gluten to become interrupted by the tiny sharp, non-stretchy parts of the grain. These tiny pieces in the flour interrupt the long, strong, stretchy gluten bonds turning them into lots of smaller, shorter ones. Remember point 1? Wholemeal flour needs more water and more time to develop the gluten? It’s already having a little trouble in comparison to its white counterpart. The bran and germ further weaken the stretchability of your dough.
Adding a lot of seeds, or fruit and nuts can do the same thing. However, they are much larger and therefore less evenly dispersed throughout the flour on a micro-level, so the impact on the overall dough is less; the strands of gluten are not cut into such small pieces over and over again. Adding Vital Wheat Gluten to these doughs can help.
3. The additional nutrients cause the sourdough culture to respond differently
The extra goodness in the flour, provided by the retention of the wholegrain, gives a great boost to your sourdough culture. They love it! And as their growth speeds up, so does the fermentation process. The end result is that your wholemeal flour needs more time to absorb the water in the dough, but the sourdough culture needs less time to grow.
Overcome this by using tap water and a cooler environment to rise your wholemeal sourdough. Sourdough cultures grow faster when they are warm. So if you cool everything down a little, while they will speed up their growth with the wholemeal goodness, they will curb their growth a little with a cooler temperature. Thus buying your dough time to hydrate.
Can I feed my sourdough starter with wholemeal flour?
Yes. Any grain-based flour will work. Just note, the grain must contain some gluten. If it doesn’t have any at all, you need a gluten-free sourdough starter. #goalsformyfuture
MIXING FLOURS
You can mix wholemeal bread flour together (for a lighter wholemeal loaf) with white bread flour in any proportion. Adding white bread flour will reduce the amount of bran and germ in the overall dough. Less little particles to cut through the strands of gluten and more available soft flour for easy water absorption and stretchy, long gluten.
The sourdough culture will love the extra nutrients (so will your tummy!) and the dough will love the extra strength.
TIP: Your final loaf will take on the most characteristics of the flour you use in the greatest proportion. E.g The more wholemeal flour you use, the more wholemeal characteristics it will have – taste, texture and hydration.

WHERE TO BUY WHOLEMEAL FLOUR
Since I don’t bake with it a whole lot, I use wholemeal bread flour that I can get at the supermarket because the quantities are smaller.
If you can’t get wholemeal bread flour (13% protein) at your local supermarket, or want to buy it online, try Amazon. Delivery is free for Prime or orders over $39. You may also get free delivery for your first purchase.
Buy spelt wholemeal bread flour online
Organic Whole-Wheat Bakers Flour (5kg) Makes 10 Loaves
Australian. This only has 12% protein. I recommend adding Vital Wheat Gluten (7g per loaf or 16g per kilo)
Sustainable Stoneground Whole–Wheat Heritage Flour (5kg) Makes 10 Loaves
13.2% Protein. Australian. Wheat type from prior 1960 – unmodified.
INGREDIENTS
180g Active Sourdough Starter (6.3 oz) SEE NOTE
415g (14.6 oz) Wholemeal bread flour (13% protein)
335g Water* (11.8 oz)
9g Salt (0.32 oz)
*Use tap water temperature
NOTE
180g sourdough starter (6.3oz) is equivalent to:
1. Low-maintenance Sourdough Starter Your jar from the fridge + 2 feeds (Steps 1-2)
2. Pantry Sourdough Starter 1 Batch: 3 Feeds (Steps 1-3)
3. Traditional sourdough starter fed to more than 180g (6.3oz) so that you have some leftover to continue feeding
Why I use weight to measure ingredients
PREPARE YOUR SOURDOUGH STARTER AHEAD
Low-maintenance: 2 Feeds. Steps 1-2 in the recipe card with your kit
Pantry Sourdough Starter: 3 Feeds. Steps 1-3 in the recipe card with your kit
Traditional sourdough starter or YOUR OWN STARTER: You need 180g of sourdough starter (6.3oz), fed and doubled by the time you make the dough.
DOUGH
1. Scoop 180g of sourdough starter (6.3 oz) into a large mixing bowl.
2. Add 9g of salt (0.4oz) and 335g of warm or room temp water (11.8 oz) directly to your bowl with the sourdough starter and stir vigorously to dissolve all solids.
3. Add 415g Wholemeal Bread flour (14.6 oz) to the wet ingredients and mix well to combine.
4. Squeeze the mix (like a sponge) for 1-2 minutes using your hands. This will help ‘push’ water into the flour and hydrate it. Clump the dough into a ball shape and wash your hands.
5. Cover the bowl* with cling wrap^ and leave and leave somewhere where the temperature will be fairly stable.
Doubling guide time for your kitchen temperature at the moment:
– 18°C or below (64°F): 8+ hours
– 19-23°C or below (65-74°F): 6-8 hours
– 24°C or above (75°F): 4-5 hours (try not to rise a wholemeal dough at this temperature. The flour will not hydrate as fast as the sourdough culture will ferment it)
If you are around while your sourdough is rising, as you approach the end of the rise time check every now and then to see if the dough has doubled in size. Especially if you just guessed the temperature.
Your dough will be ready to shape when it’s twice its original size, puffy and a number of bubbles may be poking through the surface or seen on the side. (Using a glass bowl makes it easy to see but not essential!)
*If you don’t mind doing an extra step, using a clean, lightly oiled bowl stops the dough from sticking to the bowl during the rise. When you tip the dough out later, you will keep all the lovely air pockets that form. When dough sticks to the bowl, it stretches as it releases and tears the air pockets that help it rise.
^Using a clear reusable shower cap over your bowl, instead of cling wrap, helps put less plastic in landfill.
SHAPE
1. Lightly oil your bench-top and gently tip out your dough. If you made enough for two loaves and made it as one dough, use a dough scraper or firm plastic spatula, cut the dough into two equal halves.
Work gently from here. You want to keep as many air bubbles in your dough as possible.
2. Using wet hands, pinch one side of the dough and stretch it up towards the ceiling, then fold across the dough to the other side. Pinch next to where you pinched last time and repeat. Work your way around the dough, overlapping the previous fold through the centre each time. This process is like wrapping a present tightly. Pull and stretch 12-14 times until your dough becomes tight. It will start to resist as you work until it becomes too difficult. Then you know you’re done!
3. Grab a piece of baking paper and gently place your loaf onto the sheet seam side underneath.
4. Use the baking paper to lower the loaf into a large Tupperware container or oversized bowl.
5. Seal with the Tupperware lid or cling wrap and place into your refrigerator for a minimum of 10 hours, and up to 24 hours.
That’s it until you bake!
BAKE
Before following the next step, you need to choose your baking method:
Dutch oven or casserole dish
Pizza stone
Faking it – Baking without a Dutch oven or pizza stone
1. Preheat your oven for 45 minutes to 1 hour at 250°C (482°F). Remember to add your Dutch Oven, Pizza Stone or chosen bake-ware. The heat absorbed during this time is super important in helping the loaf rise.
2. After the oven has been on for an hour, take your loaf out of the fridge. Lift it from the container using the baking paper and place it on the bench.
3. Brush your sourdough loaf generously with water* and lightly dust with flour.
4. Using the sharpest knife you have or a razor blade move deeply, quickly and confidently on an angle through the loaf. If you go slow, the knife will drag the dough. This helps control the oven spring and make your loaf look professional.
5. To bake your sourdough bread follow the method chose:
Dutch oven or casserole dish
Pizza stone
Faking it – Baking without a Dutch oven, casserole dish or pizza stone
6. Your loaf is cooked when it sounds hollow as you knock it on the bottom with your knuckles. (Like knocking on a door.)
*Wetting your sourdough loaf stops the crust from forming early and restricting the size of the loaf. It also helps to add gloss to the crust and make it crunchy.

CELEBRATE!
Tag us so we can celebrate with you!
#mysourdoughlovestory #beautifullivingmadeeasy
@beautifullivingmadeeasy