Ingredients | Sourdough starter | Pre-dough Prep | Dough | Shape | Bake
My favourite part of the sourdough process is the fermenting aroma. I love it afresh each time! This special loaf, created by a customer and newbie-Sourdough officiando Leanne, takes that aroma to the next level. This easy sourdough recipe NEEDS to be made for its smell! The fermenting aroma of the dough is woven together with the complexity of garlic and ripening parmesan cheese as it sits at room temperature melding with oregano.
Leanne nailed sourdough the first time using our Pantry Sourdough Starter and within a few bakes she was inventing new loaves that I had not even made!
This loaf would make a great meal accompaniment, fresh and buttered or wonderful toasted sandwiches with just that little bit ‘extra’.
INGREDIENTS
180g Active Sourdough Starter (6.3 oz) SEE NOTE
310g White Bread flour (10.9oz) (Or 415g / 14.6 oz if you omit the rye flour)
100g Rye flour (Leanne used German Rye) (3.5 oz)
285g Water* (10 oz)
9g Salt (0.4 oz)
25g Vital Wheat Gluten* (0.9 oz)
5g Garlic powder (0.2 oz)
50g Parmesan cheese (grated) (1.7 oz)
1 TBS Dried Oregano
NOTE
180g sourdough starter (6.3oz) is equivalent to:
1. Low-maintenance Sourdough Starter Your jar from the fridge + 2 feeds (Steps 1-2)
2. Pantry Sourdough Starter 1 Batch: 3 Feeds (Steps 1-3)
3. Traditional sourdough starter fed to more than 180g (6.3oz) so that you have some leftover to continue feeding
*Use warm for a faster rise, use room temperature water for a slower rise such as during a workday or overnight.
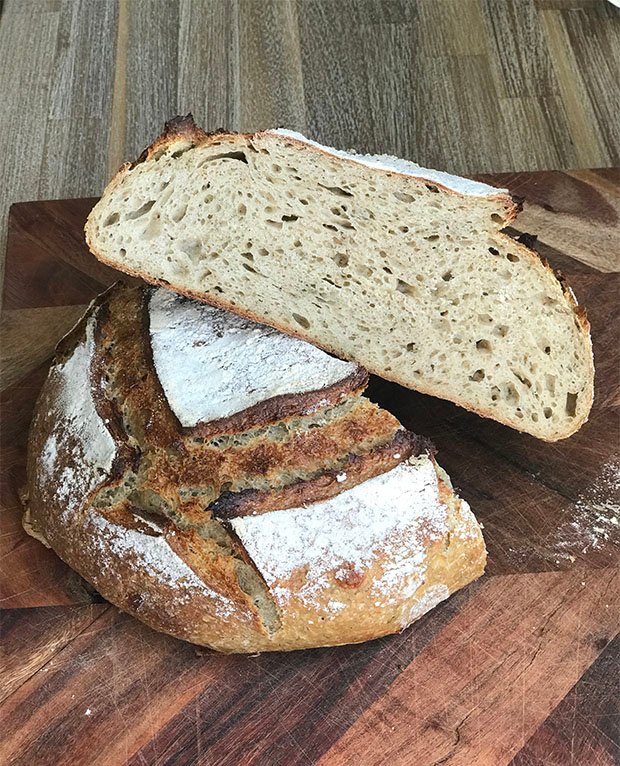
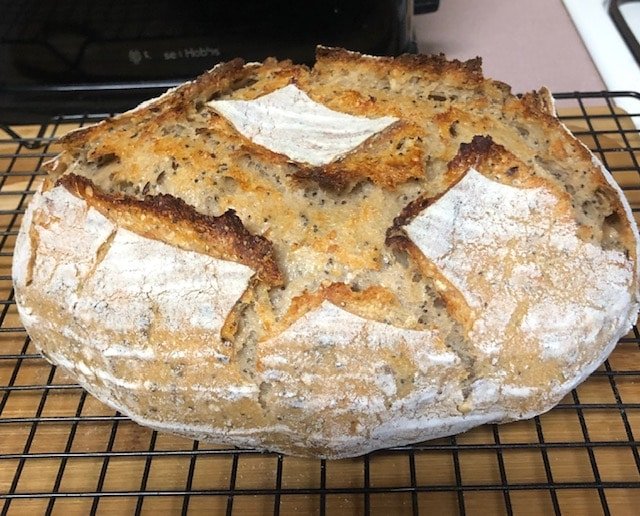
**Vital wheat Gluten is 75% protein and helps add structure to bread when there’s lots of fruit or nuts added. You can see the difference in my two loaves shown in the photos. The shallower slices are without the vital wheat gluten and the higher loaf is with it. Both taste the same. The shallow sourdough is not faulty or flat, it just didn’t have the same oven spring.
Where to get VItal Wheat Gluten
Australia: I’ve found the cheapest online is from Amazon AU or try health food stores.
All other countries also try Amazon worldwide or your local health food store.
Why I use weight to measure ingredients
PREPARE YOUR SOURDOUGH STARTER AHEAD
Low-maintenance: 2 Feeds. Steps 1-2 in the recipe card with your kit
Pantry Sourdough Starter: 3 Feeds. Steps 1-3 in the recipe card with your kit
Traditional sourdough starter or YOUR OWN STARTER: You need 180g of sourdough starter (6.3oz), fed and doubled by the time you make the dough.

DOUGH
1. Scoop 180g of sourdough starter (6.3oz) into a large mixing bowl.
Following the Low-maintenance process? You will have 5g of sourdough starter left in your jar (0.2oz). Now is the time to do FEED 1: Add 10g warm water (0.4oz) & 10g bread flour (0.4oz) to the small amount of starter in your jar. Stir & place in the fridge until next bake or each month, whichever comes first.
Pantry Sourdough Starter and Traditional sourdough processes don’t require any specific action. However, a traditional starter may need feeding.
2. Add 9g of salt (0.4oz) and 285g of water (10 oz) directly to your bowl with the sourdough starter and stir vigorously to dissolve all solids.
3. Add 25g Vital Wheat Gluten (0.9 oz), 5g garlic powder (0.2oz), 50g Parmesan cheese (1.7 oz) and 1 TBS dried oregano, 300g White bread flour (10.6oz) and 110g rye flour (3.9oz) ~ OR ~ 415g white bread flour only (14.6oz) and mix well to combine.
4. Squeeze the mix (like a sponge) for 1-2 minutes using your hands. This will help ‘push’ water into the flour and hydrate it. Clump the dough into a ball shape and wash your hands.
5. Cover the bowl* with cling wrap^ and leave and leave somewhere where the temperature will be fairly stable.
Doubling guide time for your kitchen temperature at the moment:
– 18°C or below (64°F): 12+ hours
– 19-23°C or below (65-74°F): 8-10 hours
– 24°C or above (75°F): 4-5 hours
If you are around while your sourdough is rising, as you approach the end of the rise time check every now and then to see if the dough has doubled in size. Especially if you just guessed the temperature.
Your dough will be ready to shape when it’s twice its original size, puffy and a number of bubbles may be poking through the surface or seen on the side. (Using a glass bowl makes it easy to see but not essential!)
*If you don’t mind doing an extra step, using a clean, lightly oiled bowl stops the dough from sticking to the bowl during the rise. When you tip the dough out later, you will keep all the lovely air pockets that form. When dough sticks to the bowl, it stretches as it releases and tears the air pockets that help it rise.
^Using a clear reusable shower cap over your bowl, instead of cling wrap, helps put less plastic in landfill.
SHAPE
1. Lightly oil your bench-top and gently tip out your dough. If you made enough for two loaves and made it as one dough, use a dough scraper or firm plastic spatula, cut the dough into two equal halves.
Work gently from here. You want to keep as many air bubbles in your dough as possible.
2. Using wet hands, pinch one side of the dough and stretch it up towards the ceiling, then fold across the dough to the other side. Pinch next to where you pinched last time and repeat. Work your way around the dough, overlapping the previous fold through the centre each time. This process is like wrapping a present tightly. Pull and stretch 12-14 times until your dough becomes tight. It will start to resist as you work until it becomes too difficult. Then you know you’re done!
3. Grab a piece of baking paper and gently place your loaf onto the sheet seam side underneath.
If you don’t mind another step for optimal oven spring, read this post about placing your loaf with the seam side up instead of underneath.
4. Use the baking paper to lower the loaf into a large Tupperware container or oversized bowl.
5. Seal with the Tupperware lid or cling wrap and place into your refrigerator for a minimum of 10 hours, and up to 24 hours.
That’s it until you bake!
BAKE
Before following the next step, you need to choose your baking method:
Dutch oven or casserole dish
Pizza stone
Faking it – Baking without a Dutch oven or pizza stone
1. Preheat your oven for 45 minutes to 1 hour at 250°C (482°F). Remember to add your Dutch Oven, Pizza Stone or chosen bakeware. The heat absorbed during this time is super important in helping the loaf rise.
2. After the oven has been on for an hour, take your loaf out of the fridge. Lift it from the container using the baking paper and place it on the bench.
3. Brush your sourdough loaf generously with water* and lightly dust with flour.
4. Using the sharpest knife you have or a razor blade move deeply, quickly and confidently on an angle through the loaf. If you go slow, the knife will drag the dough. This helps control the oven spring and make your loaf look professional.
5. To bake your sourdough bread follow the method chose:
Dutch oven or casserole dish
Pizza stone
Faking it – Baking without a Dutch oven, casserole dish or pizza stone
6. Your loaf is cooked when it sounds hollow as you knock it on the bottom with your knuckles. (Like knocking on a door.)
Serve toasted with lashings of butter or ricotta cheese and honey.
*Wetting your sourdough loaf stops the crust from forming early and restricting the size of the loaf. It also helps to add gloss to the crust and make it crunchy.

CELEBRATE!
Tag us so we can celebrate with you!
#mysourdoughlovestory #beautifullivingmadeeasy
@beautifullivingmadeeasy


