

Everyone has what it takes to make great sourdough
Sections: Flour | Sourdough Starter | Doubling is key | Temperature & Timing | Shaping | Measuring | Summary | Fix flat sourdough bread easily
Making sourdough bread has become one of my life’s greatest passions but the early days, like so many people, were filled with a lot of disappointment in the form of flat… very flat… sourdough loaves.
So much effort goes into the process from beginning to end. Waiting hours, sometimes days… using cheap flour, expensive flour. All of it! But your beloved loaf of sourdough bread emerges from the oven, and your heart sinks lower than the loaf you’re looking at. Something when wrong.
Your sourdough bread is flat.

I don’t know how many times I’ve been there, in your shoes. Even now, after nearly 15 years of baking, hacking, complicating and simplifying sourdough (only to still fall in love with it all over again each time!); I too can produce sourdough bread that’s flat. Only now it’s usually when I deviate from what I know, just a bit too much!
Here’s the good news in that – I’ve messed with the sourdough bread making process so much, that I know intimately, just about every reason for flat sourdough bread and how to avoid it easily. And that’s why we’re here together.
I’m going to help you understand what makes sourdough bread go flat and how to fix it. We won’t use a whole lot of science (if any at all) and NO bakers percentages! If you’re after the nitty-gritty, sorry! This is going to be simple. Common sense for the common kitchen so you can make successful sourdough bread at home easily and be proud of it!
You may like to bookmark this page to refer to as often as you like, as you walk out the magical sourdough journey.
If you are having serious issues, you may like to also read 4 Key reasons why your sourdough bread is flat.
Here we go!
Flour
If your sourdough bread is turning out flat, you HAVE to start with your ingredients.
Sourdough starter cultures are living organisms requiring food and water to thrive. Like any living thing, they can die from dehydration and starvation, and when it comes to making sourdough bread, the type of flour you feed them matters!
Bodybuilders eat protein (some even drink it!) to gain strength and energy in preparation for heavy lifting… Sourdough bread also relies on protein for strength to do the heavy lifting of rising close to a kilo (35.2oz) of wet flour and water, with just air.
When you feed your sourdough starter, or turn it into dough, the sourdough cultures immediately get to work eating the sugars in the flour. This is why sourdough is called sourdough! As the sugars in the flour are eaten by the cultures the taste becomes observably more sour!
During this process, the cultures let off gasses that become trapped inside the gluten bonds within the sourdough starter, or dough, forming a complex web-like structure that’s filled with air pockets. This process is called fermentation.
And, this is why protein is important. This complex structure needs to be strong enough to support the cells that fill with air. We are talking tiny cell walls made of heavy, wet flour that are supported only by their own strength and the air inside them, They need to stretch without breaking or collapsing.
Think of the gluten bonds as a good quality rubber band. The stronger they are, the more they can stretch and continue to hold their shape.
Weak bonds, caused by weak flour is the #1 reason why sourdough bread is flat. Especially, in Australia. Many of our bread flours, are labelled ‘strong flour’ but are not strong enough for making a successful loaf of sourdough bread. Protein levels are just too low. But it does exist, check out this ever-growing list of what bread flour to buy and where to get it in Australia.
Bread flour… is called strong flour for a reason. It gives strength to the bonds inside your bread helping them hold shape and rise your bread!
The easy fix?
Look for 12-13% protein content in your flour. 13% is best. This is what you need to feed your sourdough starter and use to make your bread dough.
The protein content can be found in the nutritional table on the flour’s packing. It will likely read as 13g per 100g of flour or similar.
The below example shows 12.5g of protein per 100g and it makes a lovely, reliable loaf of sourdough bread.
12.5g per 100g = 12.5% protein in the flour.

It’s important that you check the nutritional table for the protein content of the flour and not rely on the labelling such as ‘strong flour’ or ‘bread flour’ on the packet.
As noted, different countries and companies label their flours differently. What is bread flour to one is all-purpose flour to another. This is also something to be mindful of when surfing the internet for sourdough bread recipes and troubleshooting sourdough issues (such as why your sourdough bread is flat). Many recipes and YouTube videos will encourage you to feed your sourdough starter with all-purpose flour or use it to make sourdough bread! However, have you noticed that this advice is from Canadians or Americans? 🖤 Their all-purpose flour is akin to the strongest bread flours in Australia. All-purpose flour in the Americas commonly has a high protein content of around 12%. All-purpose flour in Australia has approximately 8.5% protein content. The two flours are labelled the same but they have very different qualities.
This is easily overcome by looking at the nutritional table and it’s not dependant on the brand your buy or whether it’s rye, wholemeal or white. Neither does it depend on the country you live in!
A note on bread mixes
Bread mixes are used for yeasted breads that can rise without the need for protein. A suitable level of protein may be noted on the packet, however this can come from the addition of seeds or other add-ins and doesn’t mean that it’s present in the flour, which is what makes it available to the sourdough cultures.
Stick with good ol’ flour. Your sourdough doesn’t need the additional ingredients added to bread mixes to improve texture, colour and even the supermarket shelf-life of the packet. You can always add your own seeds!
Flour is explored in more depth in these articles:
4 Key reasons why your sourdough bread is flat
The big deal about bread flour and sourdough bread
Reading more about this would just be for your interest, you already know what you need: look for 13% protein. That’s it! (12% protein will likely also be okay).
See our list of recommended bread flours and where to buy them:
In Australia
Everywhere else
Sourdough Starter
Sourdough starter is the #2 reason sourdough bread is flat.
After getting your flour right, we need to get your sourdough starter kicking along nicely.
Puffy sourdough starter = Puffy sourdough bread
Flat sourdough starter = Flat sourdough bread
Whatever your starter looks like when you add it to your bread dough, is what your bread will look like when it comes out of the oven. Thick, runny, flat, puffy – anything is possible and it’s partly determined by your sourdough starter.
If your sourdough starter is able to hold air and expand without collapsing ~ your sourdough bread will hold air and expand without collapsing too!
Start with a strong sourdough starter
You need a mature, active, well-fed starter for making sourdough bread. How do you know it’s strong enough to rise bread? It will consistently double within 12-24 hours in cool conditions 18°C (64°F) but as fast as 3-6 hours when it’s warm 30°C (86°F). Over and over again. That’s a mature, well-fed sourdough starter.
Some people use the float test, where you drop a teaspoon of sourdough starter into a glass of water and see if it floats. But in almost 15 years, I have never done this once. When my starter doubles, I know it’s ready. If your sourdough starter is doubling reliably, you can be assured it’s likely not the problem. Your timing may be (and we’ll get to that) but a doubling sourdough starter is a good indication, your sourdough bread should also double. So it’s not your starter causing flat sourdough bread.
If don’t have a reliable sourdough starter, you can make your own. The process will take at least 2 weeks and can be hit and miss. My suggestion is, buy one. Buying a sourdough starter means it’s already mature, has already risen bread numerous times and you will be on your way to baking sourdough bread in as little as 2 days.
Buying a sourdough starter is an authentic way to get started. It saves a lot of troubleshooting and eliminates a poorly performing sourdough starter as one of the issues producing flat sourdough bread. I sell two sourdough starters, but you can buy any sourdough starter.
My sourdough starters are made from my 15-year-old organic wheat sourdough starter which has produced more than 700 loaves of sourdough bread during that time. (A conservative guess!) It’s also made sourdough doughnuts, pancakes, crumpets, cinnamon scrolls… so many things! Oh. And… a tonne of sourdough pizza bases.
The flavour is silky and buttery rather deeply sour. My favourite part is the aroma. It steals me afresh each time. 🖤
These are my two sourdough starters:
#1. A traditional sourdough starter. It will rejuvenate within 2 days and comes with instructions for two ways to care for it – Traditional (daily feeding) or Low-maintenance (feed when you bake or every month, whichever comes first).
#2. Pantry sourdough starter. You can store this on your pantry shelf, without caring for it, to use on those occasions that you want to bake with sourdough.
But like I said, you can buy any sourdough starter. Just avoid anything with added yeast.
So we’ve talked about what to feed your sourdough starter and where to get one if you don’t have one. Now we’re going to talk about how much to feed your starter, how often and what should happen when you do.
How to feed a sourdough starter
A sourdough starter should be fed its own weight in both water and flour. The mix should be thick and sticky, at least as thick as thick toothpaste. If it’s not, add a touch more flour.
So for example:
10g of sourdough starter, should be fed 10g water + 10g of bread flour.
The mix is now 30g. So the next feed needs 30g water and 30g bread flour and so on.
As you can see, sourdough starter triples with each feed and can get quite large quite quickly. Hence ‘sourdough discard’, the practice of keeping the sourdough starter small by removing 1/3 of it before feeding each time.
When to feed a sourdough starter
Your sourdough needs feeding every time it doubles.
There is a simple hack for this. When you feed your sourdough starter, place an elastic band around the jar at the level of the mix. This will make it clear when it has grown to twice the original size.

Sourdough starter needs to be fed each time it doubles.
When storing sourdough starter on your benchtop you may need to feed it once a day in winter, maybe up to three times a day in summer, since it grows so much faster.
You can also store your sourdough starter in the refrigerator for up to a month without feeding it. Simply take it out of the fridge before baking, give it two good feeds and continue with making your bread. We’ve combined this low-maintenance feeding process with our easy no-knead sourdough bread recipe and all the hacks that specifically help avoid flat sourdough. To give it a try click here (it will take you to the recipe and instructions)
Doubling is key
Doubling not only indicates when to feed your sourdough starter but also when to continue with the next step in the bread-making process. This helps you know when to make, shape and bake your bread dough! Just look for the previous step to double.
Doubling takes anywhere between 3-24 hours depending on the temperature of the water you use and the temperature of the place where you leave your sourdough starter, or bread dough, to double.
Insufficient growth in your starter will result in an insufficient rise in your bread.
Too much growth and your sourdough will behave like a balloon that’s reached its limits of expansion. POP!! Your sourdough reaches its peak, waits for you to take it to the next step, and if it doesn’t happen, it gives up waiting. And your sourdough starter, or dough, deflates.
Puffy sourdough starter = Puffy sourdough bread
Flat sourdough starter = Flat sourdough bread
When doubling sourdough starter – use an elastic band to keep track
As mentioned earlier, placing an elastic band around your jar of sourdough starter to show the starting level when you feed it, is an easy solution for a complex problem. It will take all the guesswork out of how far your sourdough starter has grown, or still needs to grow, to double. It will be super clear. If you don’t have an elastic band, use a whiteboard marker to note the level.
When doubling sourdough bread – use a straight-sided clear, container
Knowing when dough has doubled inside the walls of a rounded bowl can be tricky, even for me. It’s usually a good guess but never exact. Elastic bands don’t fit around mixing bowls and the curved sides mean they are wider at the top than they are at the bottom. If your bowl has measurements marked on it, you could note the unrisen dough level and double it to know when it would be doubled. E.G The dough is sitting at the 3.5 Cup mark, so it will be double when it reaches the 7 Cup mark. The measurements on the bowl will be taking into account the curvature.
An alternative is to use a straight-sided, clear plastic container. This can be a large lunch box, storage tub – something that can hold at least 2.5L (85fl oz) per loaf. Lightly spraying the container with oil will help release the dough easily, keeping all that lovely air inside it.
Dealing with deflation
Deflated sourdough starter
You will know if your sourdough starter has deflated or is in the process because it collapses on itself. The sourdough starter starts to drop back down to the original level (back to the elastic band around the jar) and turns runny.
If your next step was to feed it, it will recover with that feed.
If your next step was to make dough, you need to fix it first. Yes, it may have loads of bubbles and look wonderfully active!! But if it’s not holding any air at this point and neither will sourdough bread if you make it. Yep. If your sourdough starter is flat, your sourdough bread will be flat too.
To fix deflated sourdough starter to make it suitable for making dough:
Discard 2/3. Feed the remaining 1/3 equal to its weight in both water and bread flour. When it doubles again, make dough.
Deflated sourdough bread dough
Bread dough that has gone too far, starts looking like a flat balloon. It feels soft and wobbly, eventually becoming unstable and difficult to handle. Like the sourdough starter, it also becomes wet and runny, refusing to hold its shape. This can happen in either the first or the second rise.
The best way to avoid it in the first rise is to use a container where you can clearly see when the dough has doubled and you’re not guessing. Also, if you are not available while it’s rising to keep an eye on it, use tap water when making the dough and leave it somewhere temperate or cool like your pantry. It will cause the dough to rise slower, which extends the time it will take to double, as well as lengthening the period of time it will be stable while double before you can get back to it.
The best way to avoid your sourdough bread dough deflating in the second rise is to proof like a pro in the refrigerator. The long slow rise allows a lot of room for error and again, broadens the window of time you have to bake without over proofing. Sometimes your dough doesn’t quite double in the fridge but it will puff up when it hits the heat of the baking process.
Another effortless aspect of proofing in the refrigerator is that it works just the same in all seasons. You don’t have to adjust your proofing times to suit the current weather situation. So there is less to learn, less to troubleshoot and more sourdough to get on with!
If you do proof (second rise) on your benchtop read How to tell when your sourdough is ready to bake – The Poke Test so that you don’t under or overproof it. If the dough does go over, gently place it in a baking tin and bake without slashing it to keep as much air in it as possible. It may not look great, but I am sure it will be edible!
Temperature & Timing
Oh. You can not master sourdough until you know this dance!
Warm temperatures make sourdough grow faster, cool temperatures make sourdough grow slower. This includes the temperature of the water you use when feeding your starter or making the dough as well as the temperature of the place you leave it to rise.
This dance is how you can estimate, and control, the time it takes your sourdough to double. This way you can make sure you are available to continue when the sourdough doubles.
Condense the time it takes to double by speeding up the process with warm water and a warm environment. Don’t exceed temperatures too far over 30°C (86°F). At this temperature, with warm water, sourdough starter should take 1.5-3 hours to double. All my sourdough bread recipes use a no-knead dough which takes 4-5 hours to double in this temperature. it can be easy to over-proof in warm temperatures.
At the other end of the scale, you can slow down the growth of sourdough starter and stretch the time it takes sourdough to double by using cool tap water and a cooler environment 18-21°C (65-70°F) to rise the dough in. This is particularly helpful if you need to leave sourdough to double overnight or throughout a workday when you’re not available for quite a few hours to check on it. Your bread will also develop a lot more flavour and it much harder to overproof.
The timeframes you use in winter won’t work in summer and vice versa, unless the indoor temperature has been altered by a heater, air conditioner or temperature hack (like using your oven light to keep the sourdough warm). It’s also why you can make great sourdough for months, and then all of a sudden your sourdough bread is flat!
It was left too long in a warm environment, or it was not left long enough in a cool environment.
Sourdough likes the same temperature range as you. It will struggle to grow in when its to cold for you and risks dying when its too hot.
For ideas on how to keep sourdough warm even in winter read How to keep sourdough starter warm so it grows, even in winter
If you think understanding how time and temperature affect sourdough, might be part of the issue with your bread, I have put together a printable eBook (sold on Etsy) to give you the ‘ah ha’ moment you need. Not all advice online is helpful when everyone has unique kitchens. I provide you with detailed advice that works anywhere in the world and include many worksheets for you to choose from to record and track your own sourdough cycle, so you can proof like a Pro!
The journal is under our new brand specially for foodies: Enfoodiest

Shaping
Shaping won’t affect the internal texture of your sourdough bread like – using the right flour, starter and proper proofing will – but it will affect the height of your sourdough loaf, and produce a different kind of ‘flat‘.
Sourdough needs surface tension to rise properly. This is formed when you’re shaping the dough. Like a taught balloon that pops with power when the tension is broken, forming a tight surface the dough helps it burst with gusto when it hits the heat of the oven. A softly filled balloon doesn’t burst when pricked, because there is no surface tension. Instead is just goes lame and limp. A loaf that’s loosely shaped won’t explode in the oven either, also go limp and spread towards gravity instead of towards the sky. You will get a tasty loaf but you won’t get as much height.
To shape your bread, pull and stretch like you’re wrapping a tight, neat present. Lift the edge of the dough towards the ceiling and fold it down into the middle. Repeat, overlapping the last fold. Do this 12-14 times or until your dough is tight and it is difficult to do keep ding this. Then do 1-2 more!
You will notice, as tension forms, the folds become increasingly difficult.
When you’re done, turn the loaf over and let it proof with the folds underneath. You can proof it with the folds facing up, and flip before baking, but if you’re having trouble getting a decent loaf of bread, do it the easy way first.
A note on wet doughs
High-hydration (we) doughs can be tough to handle and therefore shape adequately, even for professionals! If your dough is constantly wet, it could be the water to flour ratio in the recipe you’re using or your flour. Some flours such as spelt, don’t require as much water as wheat. Some brands of flour don’t require as much water as others.
In either case, the fix is easy – just add less water to your dough. Sometimes reducing by 20g (0.7oz / 20ml) is enough. If you reduce by more than that you can always add more water in small increments until you reach the consistency you want. For a no-knead dough (which I use) once mixed, the texture and thickness should be like fresh, very soft, playdough.
And last but not least, this next one will also help with dough consistency…
Measuring
Did you know that 1 cup in Australia is 250ml but 1 cup in America is 236ml? That’s 14ml difference. Our tablespoons are also different. So what one volume measurement is in one country can be very different in another.
Measuring volume also varies with the personal touch of the user.
To avoid these issues, I measure all my ingredients by weight, including liquids. Yes, I know, ounces and grams are also variables but they measure the same mass. This means if you measure in Australia using grams and your friend measures in the USA using ounces, when you tip that ingredient into your bowl you will both have the same amount. This won’t happen if you use measuring cups. OR if you measure some of your ingredients by volume and some by weight.
Using weight to measure helps to keep everything consistent and the recipe true to the intended ratios. It’s also cleaner. If you use a digital scale, you can measure directly into your mixing bowl and tare (return to zero) between ingredients, ready to measure teh next one. No measuring utensils to wash up!
To learn more read Why I use weight to measure
Summary
🗸 Check your flour has 13% protein (check the use-by date while you’re there too)
🗸 Get a cranking starter happening
🗸 Look for doubling as the indication to continue with the next step
🗸 Use temperature to your advantage
🗸 Create some gentle tension
🗸 Use weight to measure
Now that you’ve read alllll that, and have a grasp of the causes and fixes, I am also going to tell you how you can conquer flat sourdough bread in one fell swoop.
If this post helped solved your flat sourdough bread issue, let us know by commenting below! What tip made the difference for you?
Fix flat sourdough bread easily
Get yourself some proper bread flour (12-13% protein) and a strong sourdough starter, then use my easy no-knead sourdough bread recipe. It has all the tips and hacks built into it to specifically avoid flat sourdough bread.
The process is not 100% traditional but it is easy and it works. You can forget about most of the variables that lead to sourdough bread being tricky for just about everyone who’s tried to make it. Time and temperature work with sourdough, just like skill and knowledge. So why not use them instead? It’s a simple way of making sourdough bread meaning you can get up and running easily, and be proud of what you bake.
My loaves might not win points on Instagram for the world’s highest sourdough loaf but it will make a successful loaf of sourdough bread without a lot of effort or having to know any of the science. It’s so easy, it’s the only process I use now, after baking sourdough for a third of my life. It’s also the only process I use across this entire site. I like to keep things simple and accessible.
So, my friends… it’s time to say “hasta la vista flat sourdough bread!” and get your sourdough bake on!
Let me know in the comments below how you went!
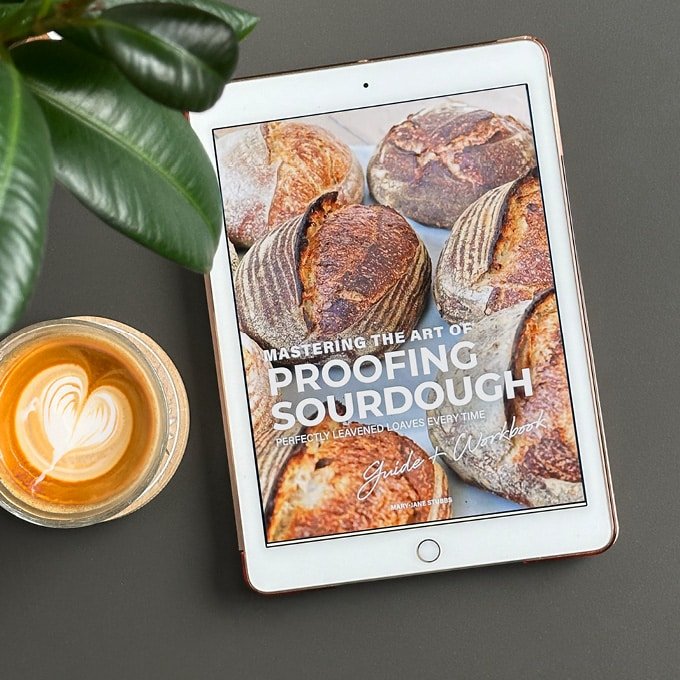
My Award Winning Sourdough Book
‘Sourdough Guide of the Year 2025’ ~ Australian Enterprise Awards
My book is tool to help you work out exactly why your sourdough bread is flat and – how to fix it.
No more guessing or trawling the internet. Use my questionnaire to diagnose the issue/s in 3 minutes. Read the relevant pages, implement the ‘aha’ and go on to rise a heart-warming loaf every time!
⭐ Read 5-Star Reviews and save 25%.
Copy this code to use at checkout: THESOURDOUGHSOLUTION
Steve Peters
August 7, 2021Thank you for the awesome tips. With your wisdom, I baked the best loaves I have made in my 15 years of attempts!!!
Mary-Jane
August 8, 2021Thank you for taking the time to leave feedback. I am so stoked to hear that your sourdough bread is working better for you! That’s fabulous!!! 🙌
Pamela Jackson
October 30, 2021Thank you for the great articles and recipe. I just started making sourdough bread and have been trying to figure it out, thought I was doing everything correct and kept getting low flat bread. Flavor good, but flat, and was ready to quit when I ran across your site. Your tips and helpful information now have me back in the kitchen with my starter to try again, knowing I will have better bread at the end of the day.
Mary-Jane
October 31, 2021Thank you for such great feedback! Sourdough was a journey for me also. I will be interested to hear how you go with my recipe and tips. If you continue to have issues, contact me. I’ll help get you up and running.
Monika
November 13, 2021Thank you Mary-Jane
You saved my confidence – now making cracking wonderful sourdough bread.
I came across your site just yesterday.
…Yes, the 13gr Protein content of the flour,
…Yes, the well preheated oven with the Dutch oven,
…and smoothing the dough with some water before oven time with a sprinkle of flour over it…
All in all your clear advice made me rise into a sourdough fan with gusto again.
Thank you so much and Kind wishes
Monika
Mary-Jane
November 15, 2021Hi Monika, Thank you for such great feedback. So glad you’re reignited for sourdough. 🙌 There’s a little happy dance in my kitchen!
Neil Upton
November 20, 2021Mary Jane
Another factor is the water you use. Chlorine in tap water impedes sourdough. Either used cool previously boiled tap water or filter the water.
Neil
Mary-Jane
November 20, 2021Hi Neil, Thank you for this! I never noticed chlorine having an impact myself but read about it online and tried to replicate it. But it didn’t make a difference for me. I have also heard metal can have an impact on sourdough and tried to replicate it as well but again it didn’t seem to make a difference. I would love to know if you have experienced the chlorine issue and what you noticed change when changing the water?